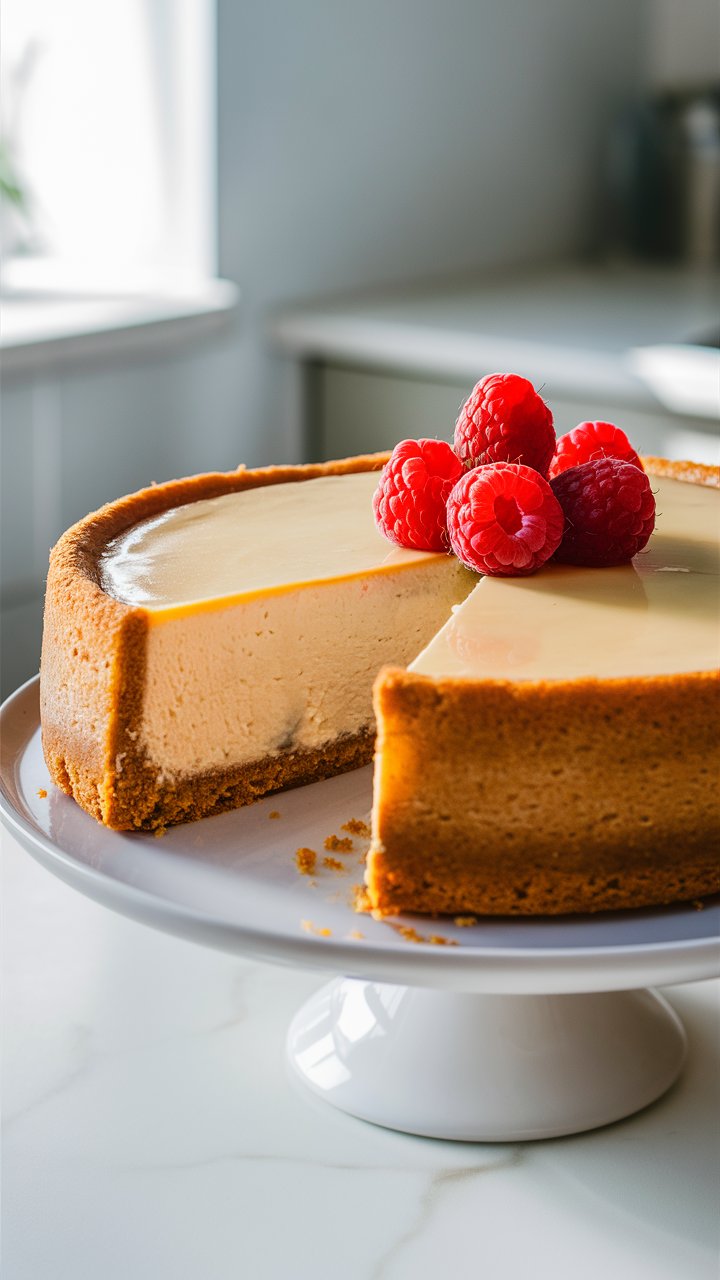
There’s something magical about a perfectly made cheesecake—the smooth, creamy texture, the rich flavor, and the delightful contrast of a crunchy, buttery base. That crisp bottom layer serves as the foundation of the entire dessert, both literally and flavor-wise. But what happens when the cheesecake base turns out soft, soggy, or disappointingly crumbly?
If you’ve found yourself wondering, “Why is my cheesecake base not crunchy?”, you’re not alone. Even experienced bakers can run into this issue. In this comprehensive guide, we’ll explore the common causes, preventative techniques, ingredient secrets, and professional tricks that will help you achieve that perfect crunch every single time.
Whether you’re a home cook baking for family or a food blogger aiming for Pinterest-worthy perfection, this guide will give you everything you need to know—and more.
Why a Crunchy Cheesecake Base Matters
Let’s begin by understanding why this seemingly small element can make or break your cheesecake.
1. Texture Contrast
A crunchy base offers contrast to the soft, creamy top. This interplay of textures creates a more enjoyable and memorable eating experience.
2. Structural Support
Without a firm base, your cheesecake might collapse or crumble when sliced. A well-baked crust adds much-needed stability.
3. Flavor Enhancement
Crushed biscuits or cookies toasted with butter develop deep, nutty flavors. These enhance the richness of the filling.
4. Presentation Appeal
Golden, crisp edges create an inviting look, making the dessert feel professional and polished.
Common Reasons Why Cheesecake Bases Turn Out Soft or Soggy
Before we fix the issue, let’s understand what might be going wrong.
1. Too Much Butter
Butter binds the crumbs, but an excess of it will saturate the mixture, preventing it from crisping up in the oven.
2. Incorrect Biscuit Type
Not all cookies are created equal. Soft cookies absorb butter too quickly and don’t hold their shape when baked.
3. Poor Crumb Texture
If your biscuit crumbs are too coarse or too fine, they won’t compact well and can lead to uneven baking.
4. Not Pre-Baking the Crust
Skipping the pre-bake step means your base won’t firm up, leading to sogginess once the filling is added.
5. Filling Added Too Soon
Pouring filling on a warm base can cause the crust to absorb moisture, softening it significantly.
6. No Moisture Barrier
High-moisture fillings (especially no-bake cheesecakes) can soak through the crust unless a protective layer is applied.
The Perfect Ingredients for a Crunchy Cheesecake Base
Let’s dive into what makes the ideal base—ingredient by ingredient.
1. Biscuits/Cookies
Best Choices:
- Graham crackers
- Digestive biscuits
- Biscoff cookies
- Gingersnaps (for spiced cheesecakes)
Pro Tip: Always choose dry, crunchy cookies. Avoid soft, chewy varieties like chocolate chip or oatmeal unless baked dry beforehand.
2. Butter
- Unsalted butter is best for flavor control.
- Measure accurately: 1/2 cup (115g) butter per 2 cups (200g) biscuit crumbs is a golden ratio.
3. Sugar (Optional)
- Use brown sugar for a slight caramel flavor.
- For a crisper finish, sprinkle a bit of sugar on the surface before baking.
4. Optional Add-ins
- Cinnamon, nutmeg, or cocoa powder for flavor complexity
- Ground nuts for added crunch and taste
- Salt (a pinch) to balance sweetness

Step-by-Step: How to Make a Cheesecake Base That Stays Crunchy
Follow this precise method to avoid any mistakes.
Step 1: Prepare the Pan
- Use a springform pan for easy removal.
- Line the base with parchment paper to avoid sticking.
Step 2: Crush the Biscuits
- Use a food processor for even texture.
- Aim for a sand-like consistency—not too coarse, not too powdery.
Step 3: Combine with Melted Butter
- Mix until every crumb is coated.
- It should clump when pressed but not ooze butter.
Step 4: Press into Pan Firmly
- Use a flat-bottomed glass to press evenly.
- Press up the sides slightly if you want a crust edge.
Step 5: Pre-Bake the Base
- Bake at 175°C (350°F) for 8–10 minutes.
- Remove when lightly golden and set.
Step 6: Cool Completely
- Let the base cool to room temperature before adding filling.
Step 7: Add a Moisture Barrier (Optional)
- Brush the crust with melted chocolate or egg white to seal it.
- This creates a protective shell before filling is poured.
Expert Techniques for a Crunchier Base
1. Use Browned Butter
Brown the butter first for a nuttier, richer crust that crisps more in the oven.
2. Add Ground Nuts
Finely chopped pecans or walnuts add crunch and hold structure.
3. Mix Biscuit Types
Combine two kinds of biscuits for complex texture. Try digestive + Biscoff or gingersnap + graham cracker.
4. Pre-Chill Before Baking
Once the crust is pressed, chill it in the freezer for 10 minutes before baking. This prevents slippage and promotes an even set.
Preventing Sogginess from Cheesecake Filling
Even the perfect base can fail if the filling is too wet or improperly added.
Tips:
- Avoid overmixing the cheesecake batter to prevent excess air (which adds moisture).
- Use full-fat cream cheese for less water content.
- Don’t add the filling until the base is fully cooled.
- Bake cheesecakes in a water bath wrapped in foil to avoid crust exposure.
Storage: Keeping Your Base Crunchy for Longer
Refrigerator
- Best for 2–3 days if crust is already baked.
- Wrap tightly with cling film.
Freezer
- Freeze pre-baked crust for up to a month.
- Wrap in both plastic and foil to avoid freezer burn.
Re-Crisping
- If crust softens, place it in a 350°F (175°C) oven for 5 minutes before filling.
Nutritional Breakdown (Per Slice, Approximate)
| Nutrient | Value |
|---|---|
| Calories | 180–220 |
| Total Fat | 10–13g |
| Saturated Fat | 6g |
| Carbohydrates | 18–22g |
| Sugar | 6–8g |
| Fiber | 1–2g |
| Protein | 1–3g |
Note: Adding nuts or alternative sweeteners can shift these numbers.
Creative Variations: Take Your Base to the Next Level
1. Chocolate-Coated Crust
Brush a melted chocolate layer on top of the crust before chilling. It hardens into a delicious barrier.
2. Spiced Crust
Add cinnamon, cardamom, or even a pinch of cayenne for depth.
3. Coconut Cookie Base
Use coconut macaroons or coconut-flavored biscuits for a tropical twist.
4. Salted Caramel Base
Swirl in a thin layer of salted caramel into the crumbs for a flavor boost.
Frequently Asked Questions (FAQs)
Q1: Can I skip pre-baking my cheesecake crust?
Answer: It’s not recommended unless you’re making a no-bake cheesecake. Pre-baking helps set and crisp the crust.
Q2: What if I accidentally added too much butter?
Answer: Add a few more crushed biscuits to rebalance the mixture.
Q3: Can I use margarine instead of butter?
Answer: Butter is preferred for flavor and structure. Margarine can make the crust softer due to higher water content.
Q4: How do I make a gluten-free cheesecake base?
Answer: Use gluten-free graham crackers or digestive-style cookies. Make sure they’re crisp and dry.
Q5: My base sticks to the pan—what should I do?
Answer: Always use parchment paper. Alternatively, grease the base lightly with butter before pressing the crust.
Conclusion: Achieving Cheesecake Crust Perfection
A crunchy cheesecake base is the hallmark of a well-crafted dessert. By using the right ingredients, mastering technique, and applying a few expert tweaks, you can ensure your cheesecake crust is always golden, crisp, and satisfying. Whether you prefer a classic graham cracker base or a nutty, cocoa-infused crust, the keys remain the same: balance, preparation, and patience.
Next time someone asks you, “Why is my cheesecake base not crunchy?”—you’ll know the answer. Better yet, you’ll have the tools to make sure yours always is.